Bought a set of castings Thur June 18[img][IMG]http://i284.photobucket.com/albums/ll14 ... r5gngq.jpg[/img][/img]
Can anyone tell me how to get the actual photo in the post instead of a link
Tiny Power M Twin Build
-
racerfrank
- Full Steam Ahead

- Posts: 114
- Joined: Mon Nov 26, 2012 8:18 pm
- Boat Name: No Boat Yet
- Location: Milton PA
![[IMG]http://i284.photobucket.com/albums/ll14 ... r5gngq.jpg[/img]](http://s284.photobucket.com/user/FrankRathmell/media/Tiny%20Power%20M%20Twin/DSC04888_zps1or5gngq.jpg.html)
-
racerfrank
- Full Steam Ahead
- Posts: 114
- Joined: Mon Nov 26, 2012 8:18 pm
- Boat Name: No Boat Yet
- Location: Milton PA
Re: Tiny Power M Twin Build
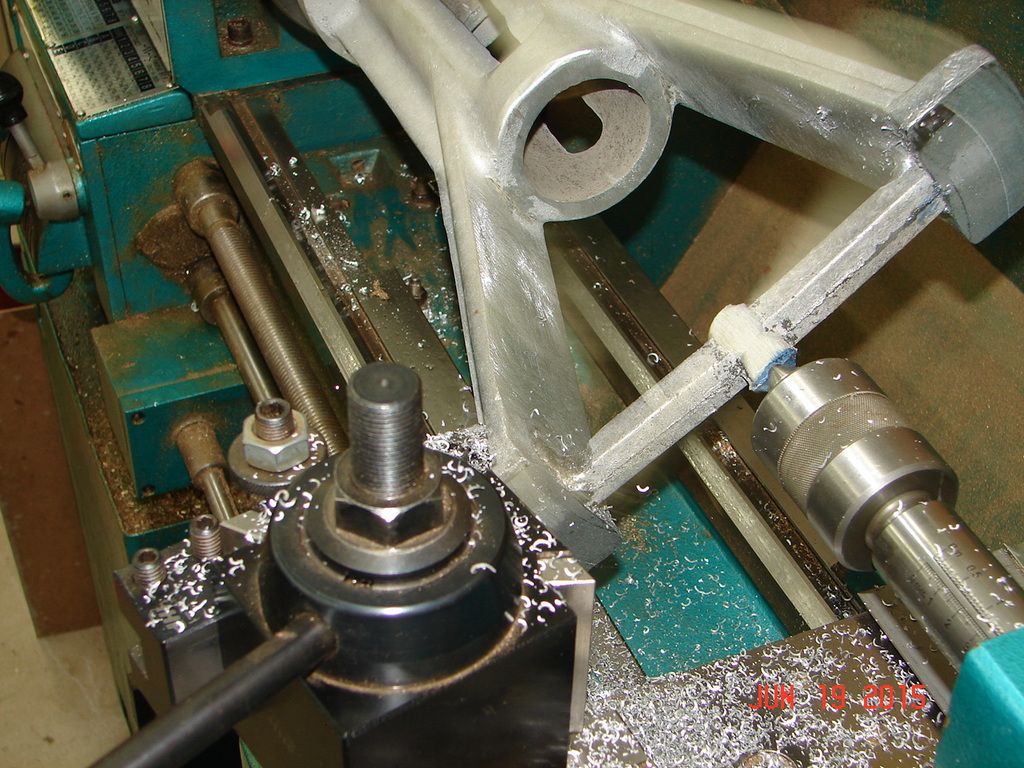
did some Machining tonight faced off the bottom of the standard feet and turned the o.d. at the top[img][IMG]http://i284.photobucket.com/albums/ll14 ... vn4e3i.jpg[/img][/img]
![[IMG]http://i284.photobucket.com/albums/ll14 ... vn4e3i.jpg[/img]](http://s284.photobucket.com/user/FrankRathmell/media/Tiny%20Power%20M%20Twin/DSC04891_zpsrjvn4e3i.jpg.html)
-
DetroiTug

- Full Steam Ahead
- Posts: 1863
- Joined: Fri Nov 27, 2009 5:56 pm
- Boat Name: Iron Chief
- Location: Northwest Detroit
Re: Tiny Power M Twin Build
Hey great engine choice, I really like mine.
To post pics:
In Photoibucket left click on the "direct" link bar that copies the location.
Then here, click on the Img button above which gives you:

Right click and paste here

Like this:
-Ron
To post pics:
In Photoibucket left click on the "direct" link bar that copies the location.
Then here, click on the Img button above which gives you:
Right click and paste here
Like this:
-Ron
-
racerfrank
- Full Steam Ahead
- Posts: 114
- Joined: Mon Nov 26, 2012 8:18 pm
- Boat Name: No Boat Yet
- Location: Milton PA
Re: Tiny Power M Twin Build
Thanks Ron
here is another view

here is another view
Re: Tiny Power M Twin Build
Nice, and that looks to be a nice steam siren on the table!
-
racerfrank
- Full Steam Ahead
- Posts: 114
- Joined: Mon Nov 26, 2012 8:18 pm
- Boat Name: No Boat Yet
- Location: Milton PA
Re: Tiny Power M Twin Build
mtnman----- yes, I build sirens do a you tube search for "steam siren comparison" for a short vid of my sirens.
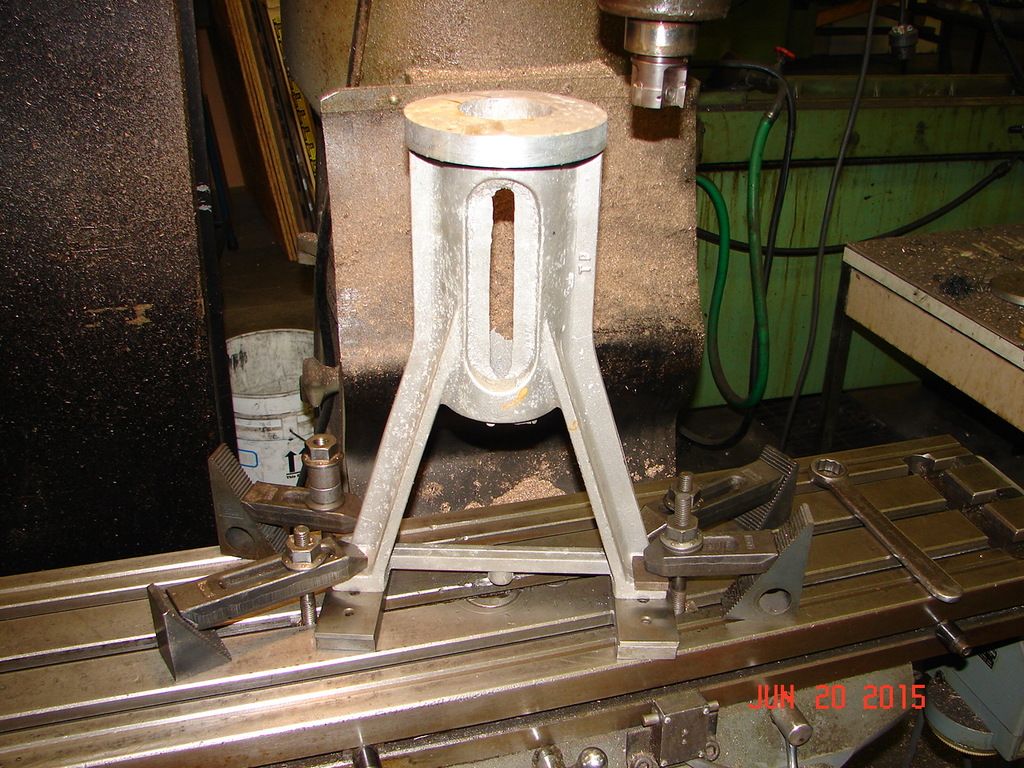
A little progress on the M today. I clamped the standards to the mill table to mill the tops of the standards parallel to the feet. The next step will be to clamp the top to table and drill the holes in the feet.
Any thoughts on machining procedure for the base?
A little progress on the M today. I clamped the standards to the mill table to mill the tops of the standards parallel to the feet. The next step will be to clamp the top to table and drill the holes in the feet.
Any thoughts on machining procedure for the base?
-
DetroiTug
- Full Steam Ahead
- Posts: 1863
- Joined: Fri Nov 27, 2009 5:56 pm
- Boat Name: Iron Chief
- Location: Northwest Detroit
Re: Tiny Power M Twin Build
Frank,
Need to dust the bottom first. If not and it's clamped to mill the top, it will be warped. Put it up on some tall parallels, then run studs with T-nuts through the square holes to secure it for this step.
Then on the top, only need to be concerned with a wide path where all the main bearings go. Then bring the four pillars to dimension. They show or did show a key way down the middle and dowels for each main bearing. I put both in mine, but I'm not sure it needs both. I think the dowels alone should be sufficient.
I went ahead and machined the whole top surface. Then added some tapped holes in the base on the outboard ends to mount pumps and generators etc. I used 1-1/4 insert cutter for all the surfacing.
And as you probably know, keep the gibs or table locks slightly tight on the saddle. When milling machines travel way out left or right the table can sag a bit and it will cause the base to be crowned in the middle.
-Ron
-
racerfrank
- Full Steam Ahead
- Posts: 114
- Joined: Mon Nov 26, 2012 8:18 pm
- Boat Name: No Boat Yet
- Location: Milton PA
Re: Tiny Power M Twin Build
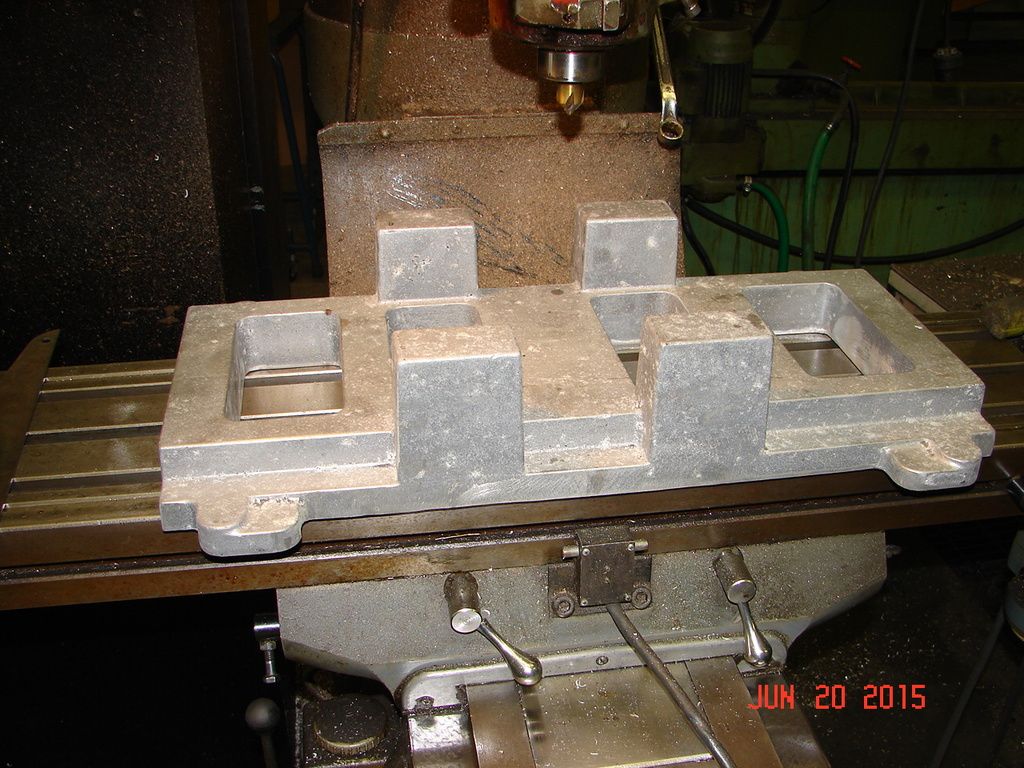
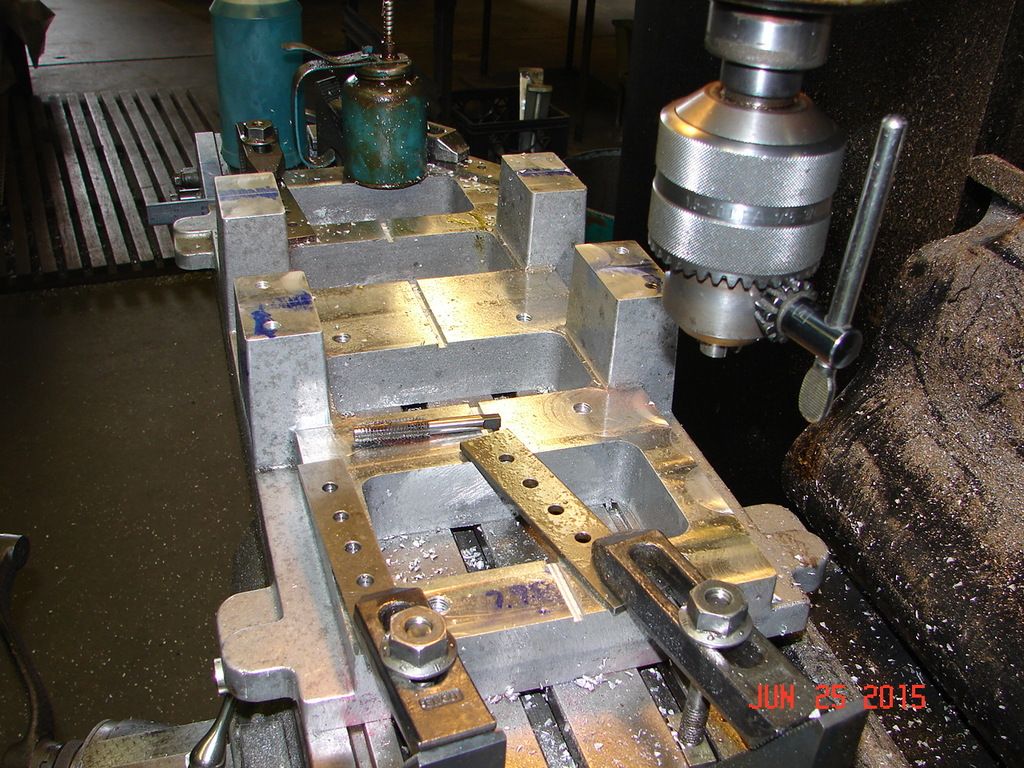
A little progress made yesterday and today. Everything I tried with parallels to machine the bottom of the base resulted in flex in the casting. when tightened down for machining. So I decided to turn it right side up and discovered I could holt it tightly with 2 hold downs like this, with no flex to the standard mounts. I then took a very light cut (.018 thousands) to clean up all 4 mount locations
It was at this point I discovered I had to make my cuts front to back because the mill at work is out of tram. Left to right would leave a line you could catch a finger nail on. This morning at break I tramed the "nod" out and with an indicator front to back (8") it now is dead on ZERO, tilt was also checked and was dead on.
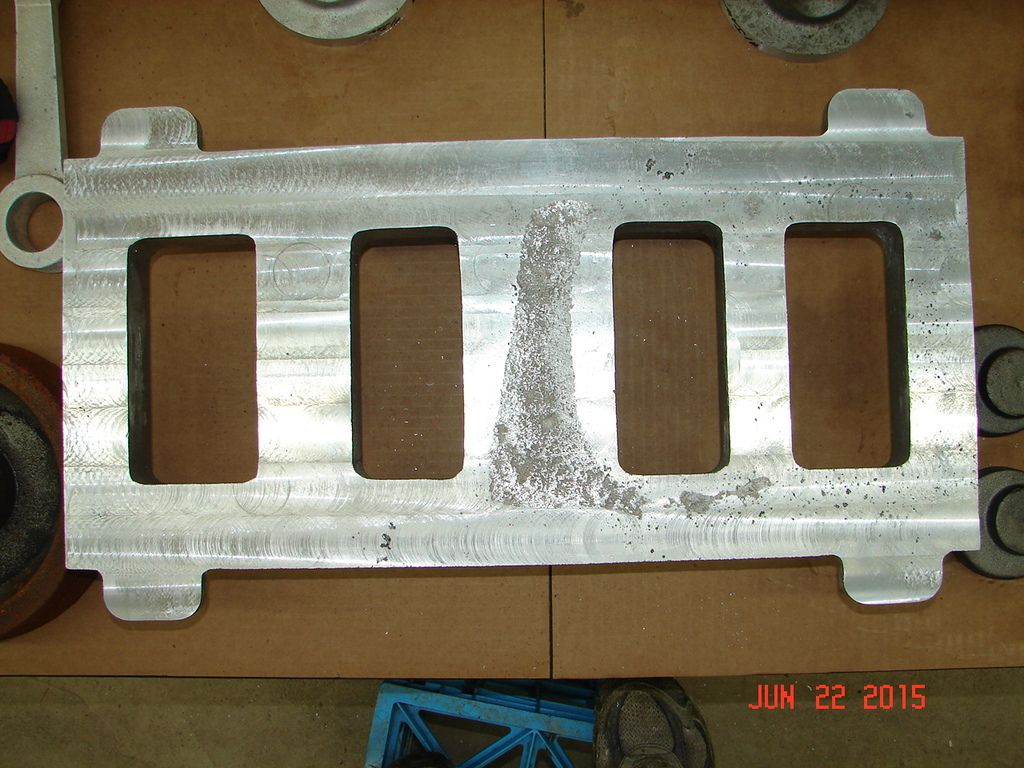
Set the base on the table upside down added some clamps and machined the bottom. there are a few small porous spots and one spot that suffered from shrinkage when cast. I removed .032 thousand's and is my opinion that the area that didn't clean up doesn't need to be and would take another .060 to do so. Any opinions? I did not have the camera with me at work to show this setup but here is what it looks like at home.
It was at this point I discovered I had to make my cuts front to back because the mill at work is out of tram. Left to right would leave a line you could catch a finger nail on. This morning at break I tramed the "nod" out and with an indicator front to back (8") it now is dead on ZERO, tilt was also checked and was dead on.
Set the base on the table upside down added some clamps and machined the bottom. there are a few small porous spots and one spot that suffered from shrinkage when cast. I removed .032 thousand's and is my opinion that the area that didn't clean up doesn't need to be and would take another .060 to do so. Any opinions? I did not have the camera with me at work to show this setup but here is what it looks like at home.
-
DetroiTug
- Full Steam Ahead
- Posts: 1863
- Joined: Fri Nov 27, 2009 5:56 pm
- Boat Name: Iron Chief
- Location: Northwest Detroit
Re: Tiny Power M Twin Build
Looks good. Some Shimstock or Joblocks will keep a casting from rocking on the parallels. I have an old set for setups.
I wouldn't worry about that bottom. I think mine is like that too. Had a deep depression in it and I didn't want to remove that much material to get rid of it -same deal.
One of the most critical points of that engine is the wrist pins. My rods small ends were screwed up by the previous attemptee and I had to bore them square which eggshaped the holes on one side. Keep all of that very tight where the crosshead is fitted so it has to be pressed together. I left things a slip fit so it would be easy to disassemble. That was a mistake. Press fit on all of that or she'll be a clacker, and I mean a few thousandths is audible. I wound up having to tear into it last year and fix the wrist pins. All of the sealed bearings on the lower end should be press fit on the OD. Then the crank mains and throws should be a snug slip fit.
They show a stud on the end of the wrist pin with a castle nut and cotter key. I just made a bronze washer for a bearing retainer and then drilled and tapped the ends of the wrist pins.
-Ron
-
racerfrank
- Full Steam Ahead
- Posts: 114
- Joined: Mon Nov 26, 2012 8:18 pm
- Boat Name: No Boat Yet
- Location: Milton PA
Re: Tiny Power M Twin Build
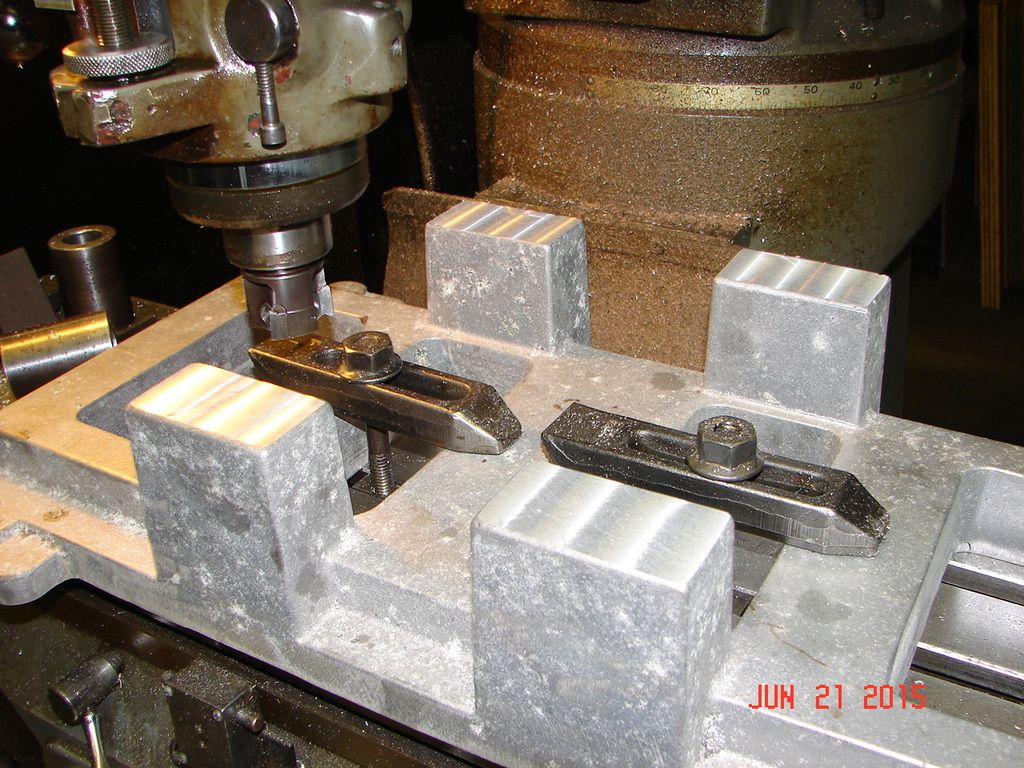
A little more progress. Centerline keyway cut and standard mount and main bearing mount holes drilled and tapped.
This would have been a whole lot easier with an operating power feed and digital read out. When I get a mill in my home shop it will have both.
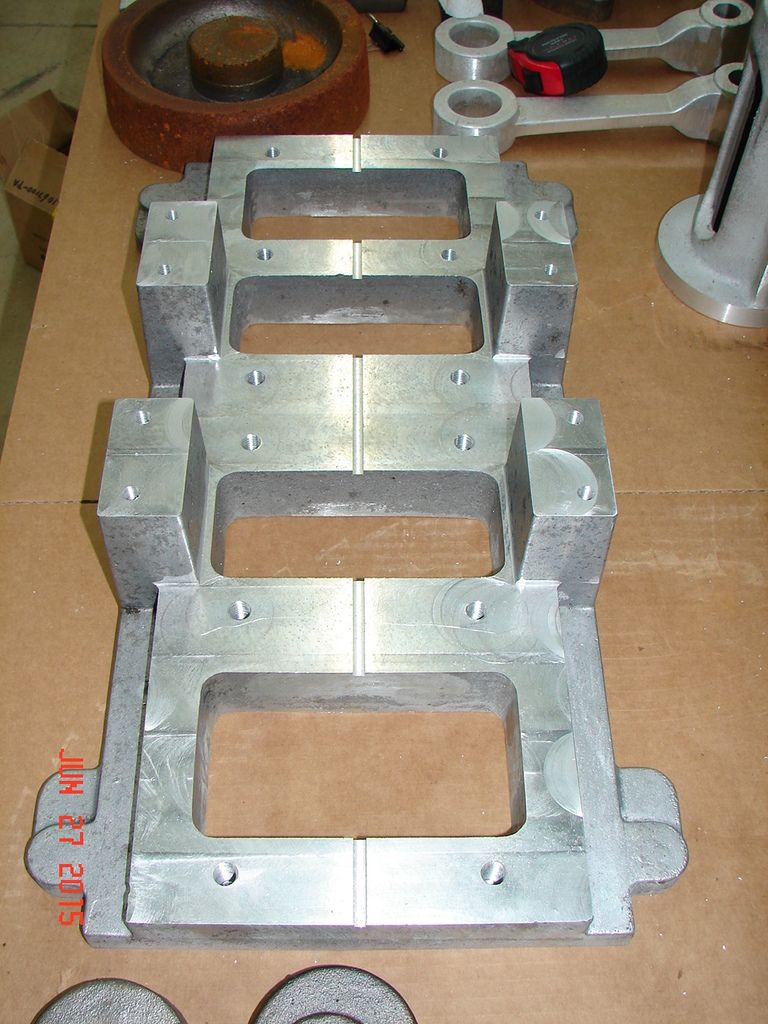
This would have been a whole lot easier with an operating power feed and digital read out. When I get a mill in my home shop it will have both.