Building a Three Drum Watertube Boiler

A special section just for steam engines and boilers, as without these you may as well fit a sail.
Johnlanark
Full Steam Ahead
Full Steam Ahead
Posts: 114
Joined: Thu Dec 10, 2009 9:09 pm
Boat Name: No Boat Yet
Location: Scotland

Re: Building a Three Drum Watertube Boiler

Post by Johnlanark »

Many thanks to Jack for that advice. I ordered an 11.75mm drill and a 12mm hand reamer from MSC/J&L on Monday and they came yesterday.

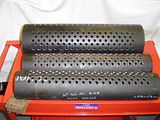
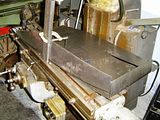
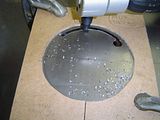
I used my milling machine to drill the holes. The table travel is long enough to do a whole row of holes at one clamp setting. The drum was clamped down on to two wooden V blocks, with wood packing sawn to the inside radius at each end. I carefully checked the longitudinal setting then used the table measurement to centre drill and pilot drill at the required 25mm centres.
Image
After I had done the first row and was in the course of rotating the drum to the next row, I realised that I had not checked properly that the holes were properly radial to the drum centre – in other words the line of holes was in the 12 o’clock position. To do this, I made a template on a piece of MDF. It has a batten at the edge and a perpendicular line at an offset of half the drum outside diameter. So when the batten is held against the outside of the drum the line of holes can be set up correctly.
Image
I took it easy with the drilling. Each hole has 5 operations - centre drill to locate and start the hole; a 6mm drill to penetrate right through; an 11mm drill to take out most of the metal, my new 11.75m drill and finally the 12mm hand reamer, used in the chuck and run slowly. The steam drum has 180 holes - sometimes I had to remind myself I was enjoying this. Still have the same number to do in the mud drums!
Image
I started thinking about the casing and ashpan. My idea is to slide the drums into the basic casing shell and then insert the tubes - a different approach from Roger who has built the pressure vessel first before starting the casing. So I need the two end panels welded to a base plate, and the top panel to keep it apart. I don’t have sheet metal working or welding facilities so will need to contract out these parts of the build. The drawings give casing and mounting details, but inevitably I am varying these to suit my boat so can’t give the drawing straight to a fabricator.

My approach was to mock up the components full size on to thin MDF, and mark on the dimensions. While I was in the groove with this I did the ashpan too, and stitched it all together with wire at the corners.
Image
Image
Image

Before giving this over to a fabricator, I need to find the inside size of the 6” stainless flue pipe specified for the inner funnel, to give the diameter of a spigot to be welded to the top panel for the funnel to be a good sliding fit over. So I’ve ordered this pipe (ebay).
John
User avatar
DetroiTug
Full Steam Ahead
Full Steam Ahead
Posts: 1863
Joined: Fri Nov 27, 2009 5:56 pm
Boat Name: Iron Chief
Location: Northwest Detroit

Re: Building a Three Drum Watertube Boiler

Post by DetroiTug »

John, Nice work. With all those tubes, should have no trouble making steam.

-Ron
Johnlanark
Full Steam Ahead
Full Steam Ahead
Posts: 114
Joined: Thu Dec 10, 2009 9:09 pm
Boat Name: No Boat Yet
Location: Scotland

Re: Building a Three Drum Watertube Boiler

Post by Johnlanark »

I trial fitted the ashpan mockup to the boat. Here I’ve cut wood blocks to give 2” clearance under the ashpan to the hog – do you think that’s enough for a wet ashpan? The wood blocks give the height of steel angles that will form the permanent bearers – with this arrangement they work out at 75mm.
Image

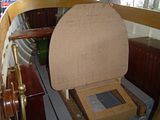
Sitting the boiler end panel on top gives an idea of how the boiler will look in the boat.
Image
There’s enough room to go over the step locker on the port side to access between forward and aft. I was also able to work out the funnel height. Pete gave us a formula but I have a notion that I may add a canopy at some times so the important thing is that the funnel will stick up through it. Sitting in the boat, I measured a clearance over my head and a little more - it worked out to a funnel length of 1100mm. The funnel will have to be detachable as the boat shelter is quite low.

I bought two lengths of 6” stainless flue pipe for the inner funnel. It is quite flimsy so the main support will have to be on the outer funnel. I’ve asked for a quote for 1.5mm thick alloy sheet 1100mm x 584mm, joggled for 25mm wide on one of the 1100 edges then rolled into an approximate tube.

Drilling the tube holes in the two mud drums was pretty much a repeat of the steam drum. Glad that’s finished.
Image
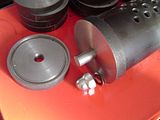
The drums have end covers sealed with stay rods, four at 16mm on the steam drum and one at 20mm on the mud drums. I formed the thread at one end of each - the rod will need trimmed to length once the covers are done so the other end will have to wait. The design emphasises the need to have a proper length of thread engagement. I started the thread by screwcutting with a single point 60 degree tool to ensure it was straight, then finished with a die to obtain the right profile. I bought these dies for this job and had to make a tailstock holder as they are too large for my existing ones (45mm diameter) and also have four retaining screw holes rather than the three in my holders.

Image
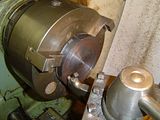
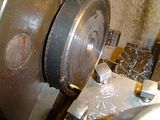
The end covers need grooves machined on one side for the drum ends and an O ring. The O ring groove is only 4mm wide. I don’t have a tool to do this job so will have to consider the options. I think I can grind down the ¼” square tool steel in a J&S holder to the profile needed - lots of front and side rake - although it will end up quite thin and sticking out of the holder a long way. Any ideas are welcome.
Image
John
Johnlanark
Full Steam Ahead
Full Steam Ahead
Posts: 114
Joined: Thu Dec 10, 2009 9:09 pm
Boat Name: No Boat Yet
Location: Scotland

Re: Building a Three Drum Watertube Boiler

Post by Johnlanark »

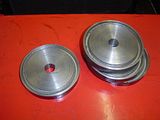
Since last writing I’ve filled a bin with swarf facing the two steam drum end plates, the four mud drum end plates and the eight feedwater/superheater plates.
I tried grinding a tool to form the grooves on these plates using the lathe, but a trial gave poor results – too much vibration and the inside curve of the slot snagged the tool even with loads of front and side rake .
Image
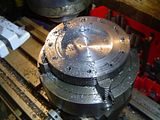
However, I had set up my dividing head vertically on the mill to index and drill pilots for the 12 bolt holes in each of the four headers for the feedwater heater and superheater. These also need an O ring groove. The idea occurred to use the set up as a rotary table, cutting the grooves with an end mill and offsetting the head to the required diameters using the mill X-axis scale. Using gentle cuts this worked a treat. The width and depth of slot were very controllable, and with a good finish.
Image
I will be able to do the same on the four mud drum end plates. The steam drum end plates are too large for the chuck, but I can perhaps clamp them to a faceplate. This BSO dividing head takes Myford lathe nose fittings.

On Wednesday I took the MDF casing mockup to a local sheet metal fabricator. They were helpful and interested and said they would quote to make up the casing and ashpan by the end of the week. They did this yesterday - £1900! This is several times what I had expected, so a Plan B will be needed – perhaps doing more of the work myself than I really had in mind.
John
User avatar
DetroiTug
Full Steam Ahead
Full Steam Ahead
Posts: 1863
Joined: Fri Nov 27, 2009 5:56 pm
Boat Name: Iron Chief
Location: Northwest Detroit

Re: Building a Three Drum Watertube Boiler

Post by DetroiTug »

John,

On the chatter turning the slot. Make the radius a bit smaller on the tool, by about 0.1mm, then walk it in, one side of the slot at a time. It's not important that the bottom of the slot is a perfect radius, the O-ring will conform.

-Ron
steamboatjack
Full Steam Ahead
Full Steam Ahead
Posts: 283
Joined: Fri Nov 20, 2009 8:02 am
Boat Name: grayling
Location: Cumbria U.K.

Re: Building a Three Drum Watertube Boiler

Post by steamboatjack »

John,
I'm afraid any advise I have is probably too late, regrading the stays screw cutting and finishing with a die is good practice but don't forget plenty of lubricant in both operations, I recomend Rocol RTD compound and keep shifting the swarf away from the job especially with dies.

ref the drum ends I would have had them cut a little oversize on outsize diameter and turned the outside to a reasonable finish, this is so ten years down the line you can easily re chuck them to skim up the faces & grooves.

Milling the o-ring grooves is ok but turning should not be a problem if you had first made under size grooves with a fine pointed tool before plunging in with the flat ended tool.

regards
Jack
Johnlanark
Full Steam Ahead
Full Steam Ahead
Posts: 114
Joined: Thu Dec 10, 2009 9:09 pm
Boat Name: No Boat Yet
Location: Scotland

Re: Building a Three Drum Watertube Boiler

Post by Johnlanark »

Thanks to Ron & Jack for the lathe turning tips. Work was held up by very cold weather, but I’ve now grooved the four mud drum end plates and the four feedheater/superheater headers, leaving just the steam drum end plates to do. Members of the Steam Boat Association will have seen in the Winter “Funnel” this week a very clear picture and description of the almost identical O ring arrangement of John Vineer’s boiler, by Ian Rutter.

By the way, click on these thumbnail pictures to view them larger.
Image
Image

I have also threaded the stays shown plain and over length in the above photo, but an email popped through from John King the other day suggesting “improved elegance” by using aluminium bronze sleeve nuts so this detail may change. Does anyone know a source for short lengths of 35mm and 40mm aluminium bronze bar?

The superheater & feedwater headers each have 12 threaded boltholes and 7 reamed holes for Cunifer tubes. This tedious drilling and tapping is in hand in small doses. On each header I marked and drilled pilot holes on the cover, opened up and tapped two of them and then drilled the rest of the blind end tapping size holes with the cover and header bolted together, using the depth stop on the drill.
Image
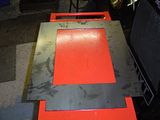
The boiler casing quote has pushed me reluctantly towards having a go at making more of it myself. Most of it is 1.2mm sheet which perhaps I can cut somehow, but the base plate is 3mm sheet which is a different story. I browed ebay and found a firm offering sheet fabrication including laser cutting; scanned and emailed them a sketch of the base plate. They quoted £25 including VAT & delivery which seemed very reasonable, and delivered it in a week. When it came, the value of the postage was £9.50 which makes it remarkably cheap. They are http://www.weland.co.uk/
Image
I’ve also bought some thinner sheet steel for the rest of the casing & ashpan, and will start work on that next. Is a nibbler the tool I need for cutting out curved shapes and large holes in sheet sheel? Thanks, John
Johnlanark
Full Steam Ahead
Full Steam Ahead
Posts: 114
Joined: Thu Dec 10, 2009 9:09 pm
Boat Name: No Boat Yet
Location: Scotland

Re: Building a Three Drum Watertube Boiler

Post by Johnlanark »

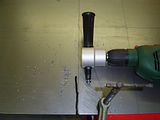
Looking at nibblers available, most seem to be for compressed air, or 110 volt site use. There are some available for single phase power but expensive for a one-off job. However nibbling attachments for handheld drills are quite cheap so I thought it was worth a try and bought one from Axminster Power Tools. http://www.axminster.co.uk/axminster-ax ... prod23286/

I had hoped for some instructions with it, but it simply read “Operate tool when motor runs” – so not much help there. A google search for “nibbling techniques” led to plenty of interesting web pages – but none of them to do with sheet metal work!

I decided to start my sheet metal apprenticeship with the ashpan, on the basis that it is not seen. I had bought three 1000x1000mm sheets and on one of them marked out the base, sides and front end from the MDF templates. I had thought it may be preferable to fold up where possible rather than weld lots of different pieces together - maybe this was the wrong decision.

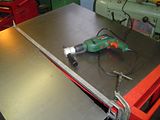
The man on the Axminster catalogue is using the nibbler freehand, but a trial freehand run on a waste corner like showed that it went through the steel OK, but was quite erratic in direction.
Image
So I clamped up a guide bar 3mm inside the required line and this gave reasonably straight cuts, with just a little filing needed to clean up. It is not the most sophisticated tool - very noisy and vibrates like crazy, but I have to say it does the job.
Image
Image
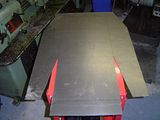
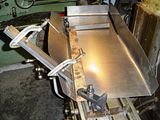
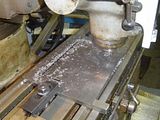
Once cut out, the ashpan was folded up on the milling machine table, with a chunky steel bar clamped down at the fold line, or in one case held down by the quill, and forcing up the sides using two pieces of flat bar clamped together. The corners are more rounded than they should be really. The edges were brought together with a bit of bashing with a hammer, over that chunky bar held in the bench vice as a sort of anvil.

Image
Image

Image

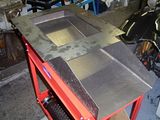
Here is the boiler base sitting loosely on top of the ashpan.
Image
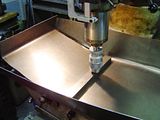
The ash clearing hatch needed a rectangular cutout for a hit & miss air control vent to be fitted, and this was done with an end mill.
Image

The next step is to cut out the two end panels and the boiler top. These have a number of large circular cutouts, up to 160mm, for drums, headers, fire door & funnel. I think these are too big for a boring head or trepanning tool, and perhaps the way to go may be to use the nibbler, with oversize circular MDF templates clamped on as guides. As always, comments and suggestions are welcome. John
farmerden
Stirring the Pot
Stirring the Pot
Posts: 447
Joined: Fri Nov 20, 2009 12:14 am
Boat Name: Steam Queen
Location: Shawnigan Lake B.C. Canada

Re: Building a Three Drum Watertube Boiler

Post by farmerden »

Well John it's amazing how we can do double duty with one tool! I had never thought of using a mill table as a break but it seems to do the job quite well! Snooping around in your photos am I seeing an early Chevrolet? It's interesting how much stuff we can get in any given area!! :lol: The boiler looks like it's coming along nicely. Den
Johnlanark
Full Steam Ahead
Full Steam Ahead
Posts: 114
Joined: Thu Dec 10, 2009 9:09 pm
Boat Name: No Boat Yet
Location: Scotland

Re: Building a Three Drum Watertube Boiler

Post by Johnlanark »

Well spotted Hawkeyeden, that is indeed our 1922 Chevrolet 490 appearing at the edges of some of the photos. A great fun car. On the use of the milling table for folding, it was just a case of needs must, I don’t have any other layout/clamping down space.

Tonight’s workholding surface was even more unorthodox. I cut out the first aperture in a boiler casing end panel, on top of my Ikea tall workshop stool. It has a few battle scars already. Having cut out a template from MDF, at the mud drum diameter plus clearance for the nibbler, I clamped it to the panel and then clamped the casing to the stool with minimum overhang. The nibbler cut the opening quickly and to reasonable accuracy without drama, starting from a 12mm pilot hole.

Image

Image

Image

I need to go and buy a half round file to open it up slightly to a sliding fit over the drum. The drum is eventually welded into place.

So now it’s just a case of repeating the process for the other openings. I’m glad the method worked, as I wasn’t at all that certain that it would. John.
Post Reply