-Ron
Tiny Power M Twin Build
-
DetroiTug

- Full Steam Ahead

- Posts: 1863
- Joined: Fri Nov 27, 2009 5:56 pm
- Boat Name: Iron Chief
- Location: Northwest Detroit
Re: Tiny Power M Twin Build
Looks good! That's a lot of cranking and counting. 
-Ron
-Ron
-
racerfrank
- Full Steam Ahead
- Posts: 114
- Joined: Mon Nov 26, 2012 8:18 pm
- Boat Name: No Boat Yet
- Location: Milton PA
Re: Tiny Power M Twin Build
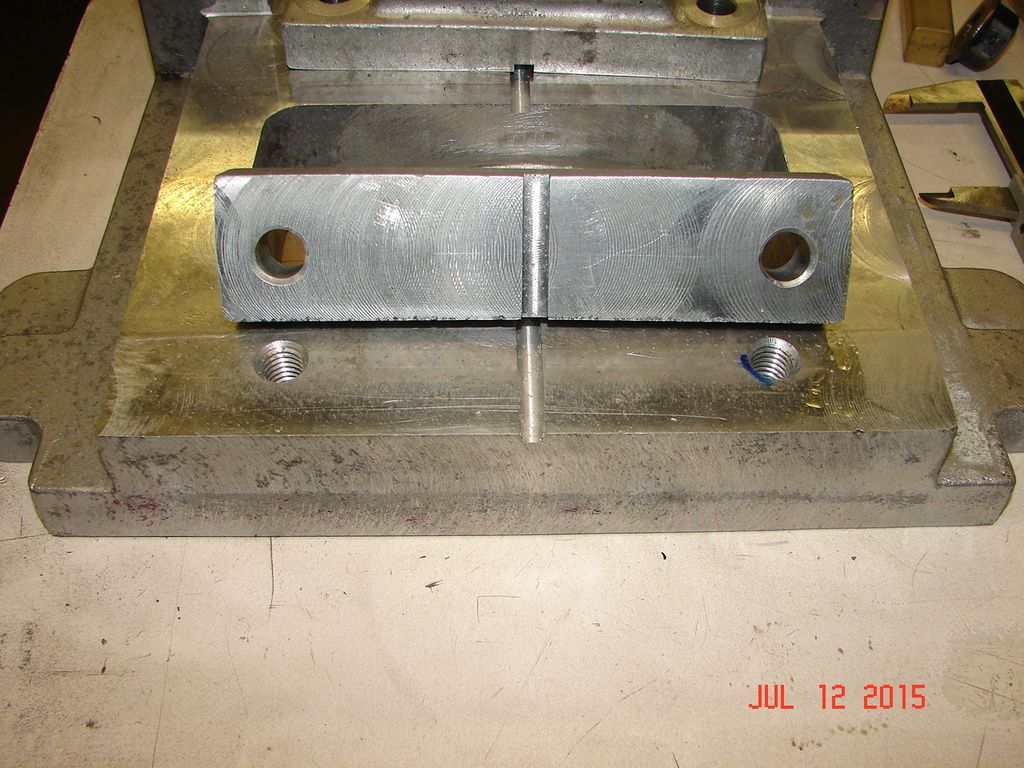
Made a little progress today on the main bearing housings. I milled them flat , centered them , cut the keyway, beveled the holes and spot faced the bolt surface. I did not add any setup photos as this was strait up milling machine stuff. I can post detailed setups if people want to see them. Any thoughts?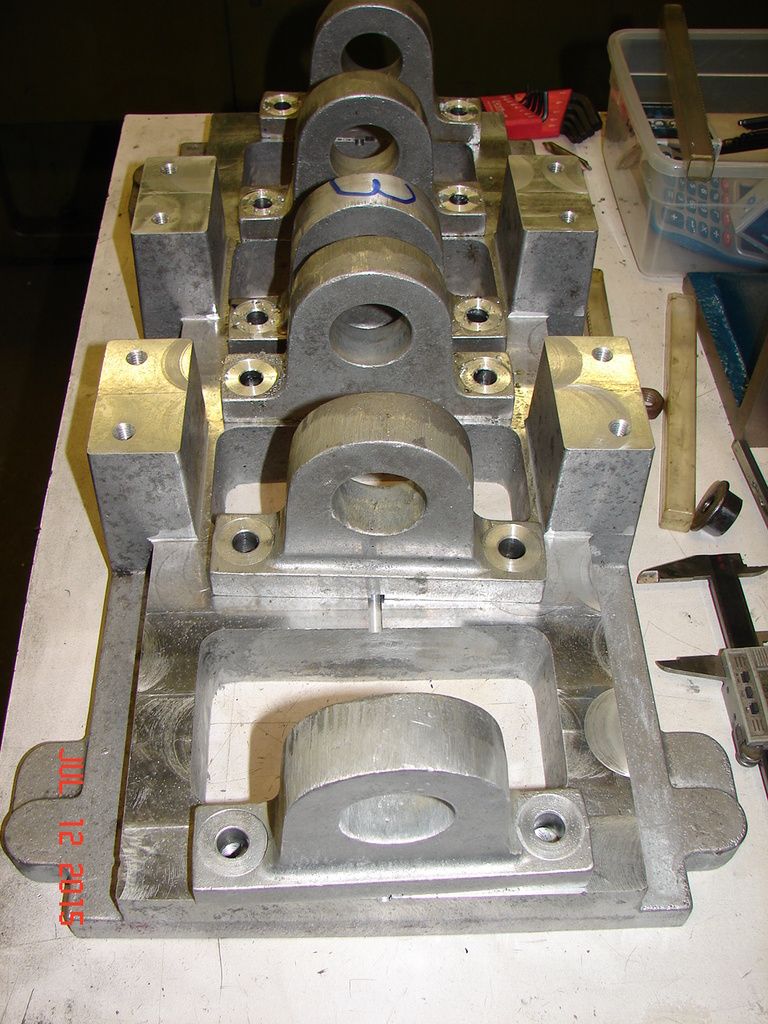
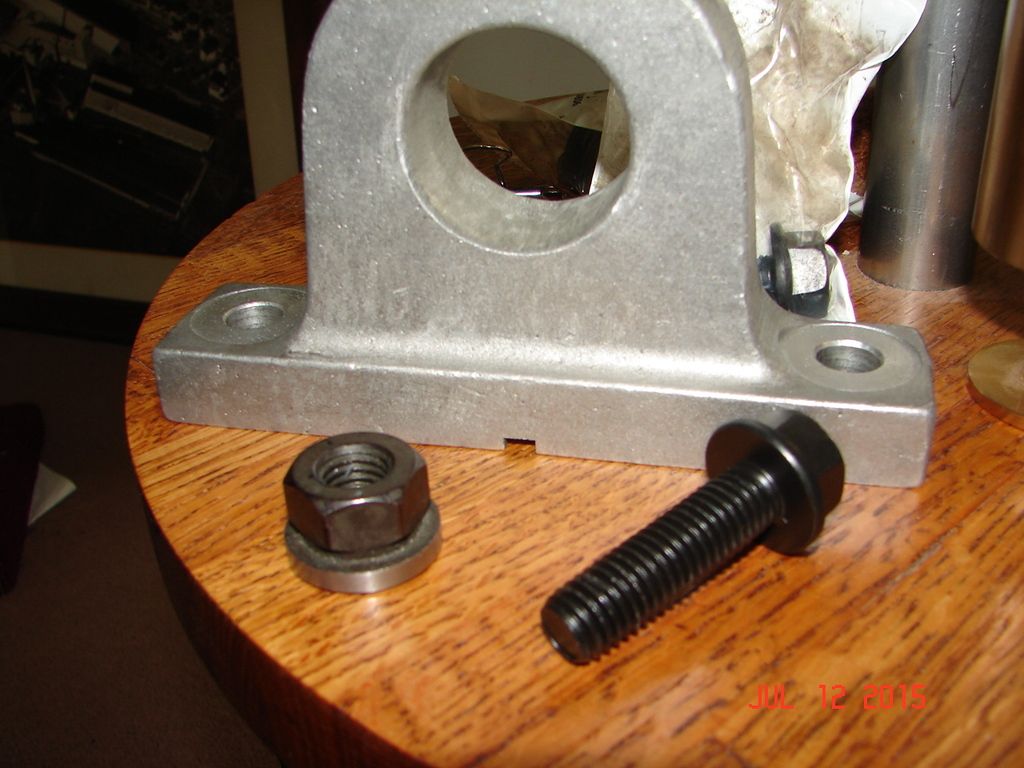
I'm not sure what I want to use as fasteners, flange bolts, studs with flange nuts? Black oxide, brass, stainless?
I'm not sure what I want to use as fasteners, flange bolts, studs with flange nuts? Black oxide, brass, stainless?
Re: Tiny Power M Twin Build
Studs with chrome acorn nuts are pretty.racerfrank wrote:I'm not sure what I want to use as fasteners, flange bolts, studs with flange nuts? Black oxide, brass, stainless?
-
racerfrank
- Full Steam Ahead
- Posts: 114
- Joined: Mon Nov 26, 2012 8:18 pm
- Boat Name: No Boat Yet
- Location: Milton PA
Re: Tiny Power M Twin Build
Finished boring the bearing housings and cut the snap ring grooves today. The angle plate was squared with the spindle and centered of the keyway groove in the plate. The offset was made to the centerline of the bearing.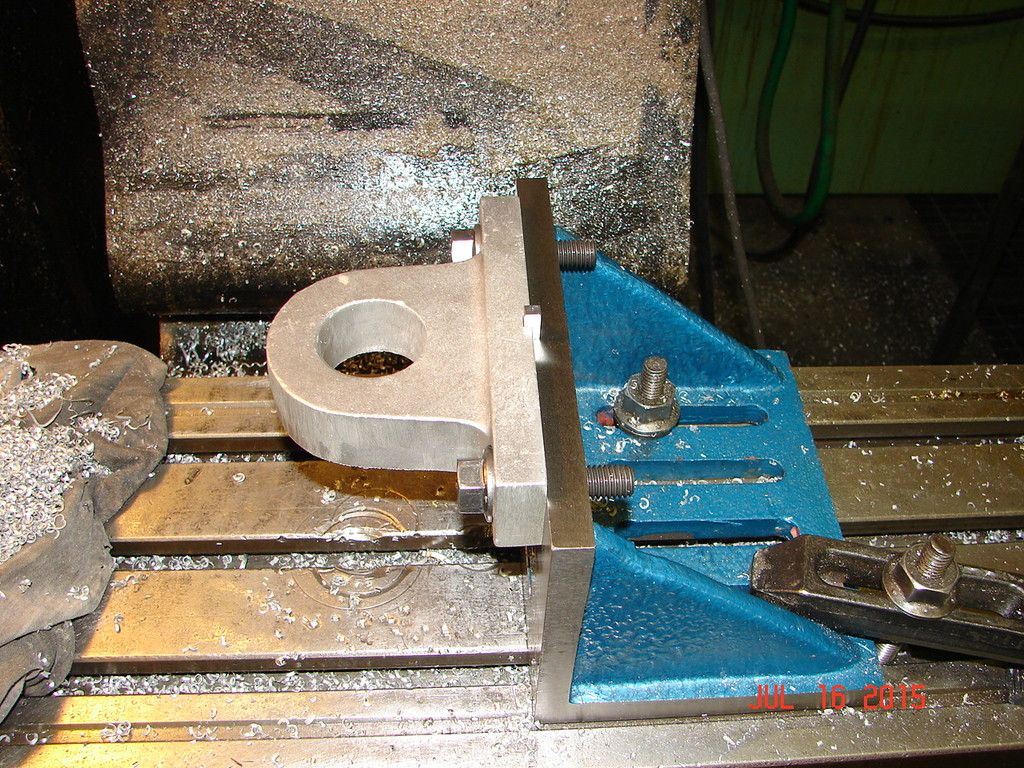
Bored.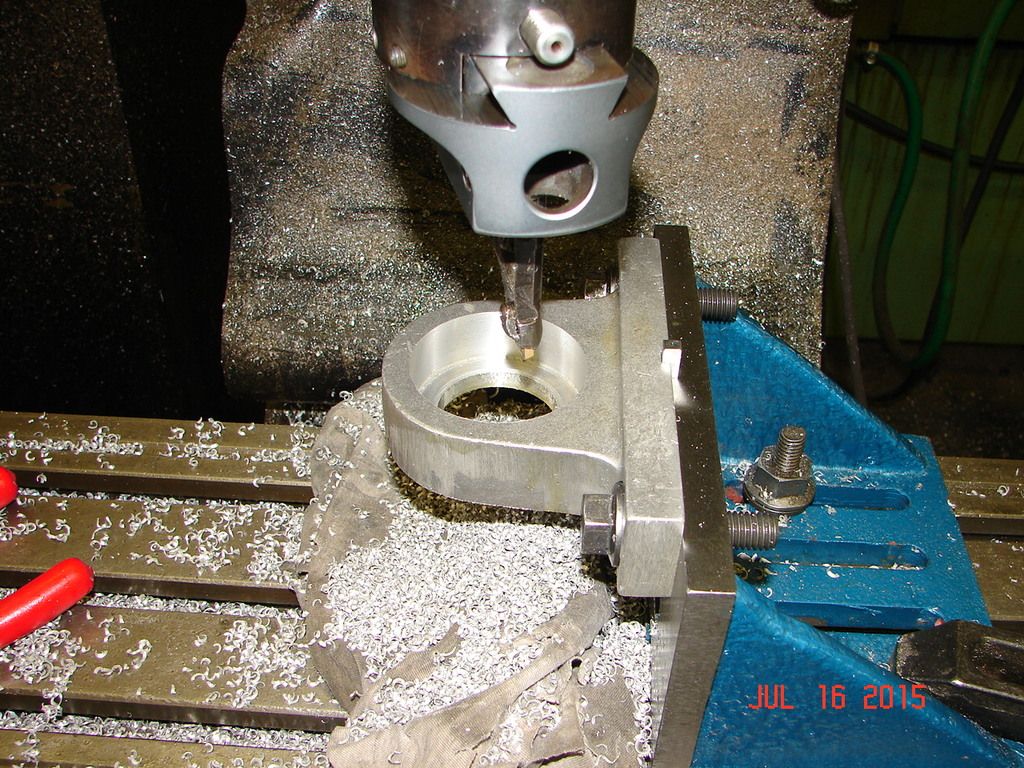
And then the snap ring groove was cut.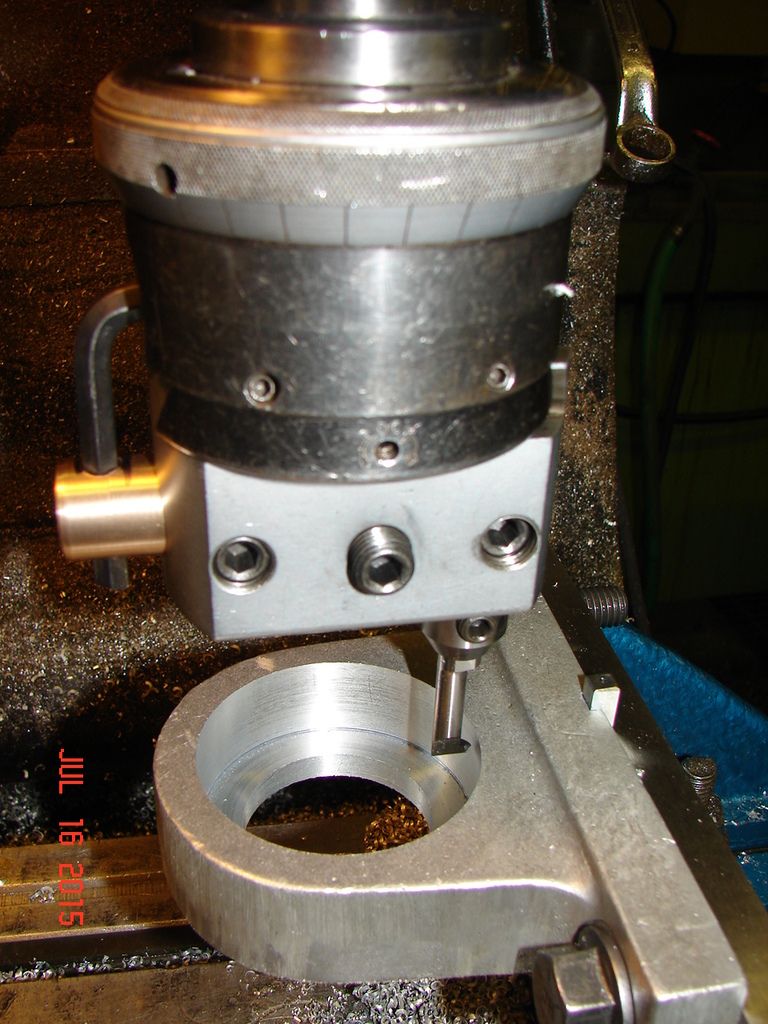
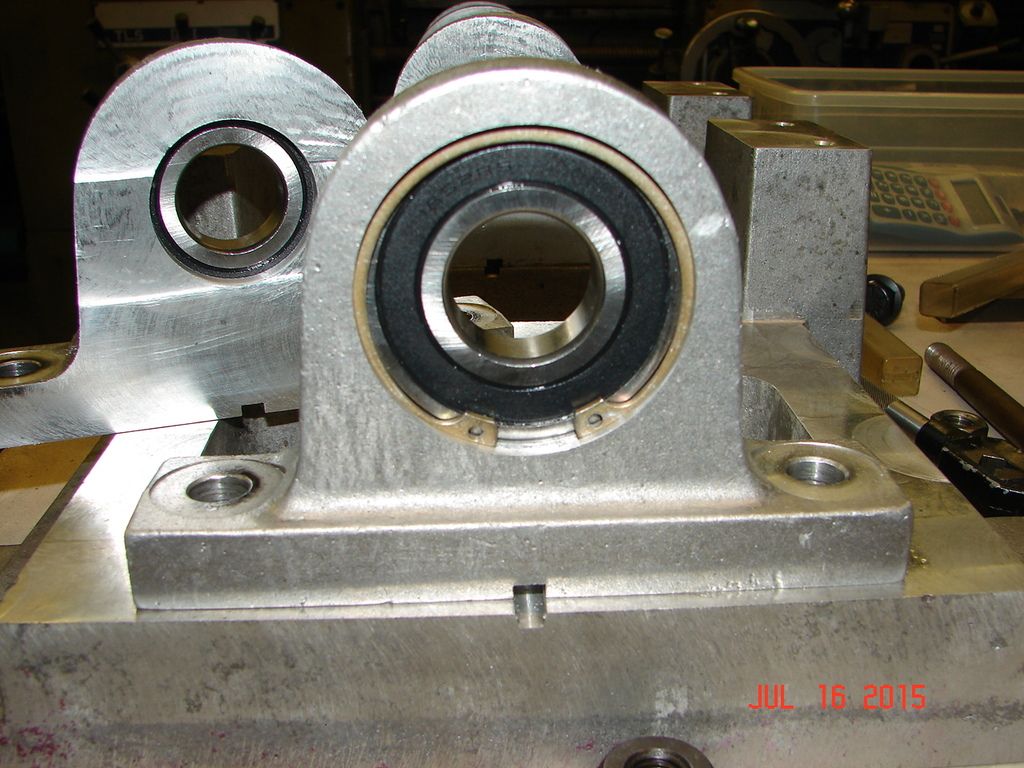
Finished, with the exception of smoothing out the outside of the housing.
Bored.
And then the snap ring groove was cut.
Finished, with the exception of smoothing out the outside of the housing.
-
DetroiTug
- Full Steam Ahead
- Posts: 1863
- Joined: Fri Nov 27, 2009 5:56 pm
- Boat Name: Iron Chief
- Location: Northwest Detroit
Re: Tiny Power M Twin Build
Frank,
Moving along at a good clip. Nice work and excellent setup strategies. You're building an engine you'll be very happy with. I just ran my twin M up the Champlain canal 62 miles. The sealed bearings on the crank and wrist pins are definitely a good route to go. Very little exterior oiling needed and everything stays tight.
My engine is from 1958 and one of the first twin M's Pop Arnold produced, he came out with the M is 1957. They have circular plate retainers to hold the bearings in instead of a snap ring. Either or is just as good.
Pop Arnold was a hard working busy man. I have a Tiny Power Catalog from 1957 and he sold castings sets for traction engines, scale locomotives, model engines etc. So many little castings to keep up with.
Regarding fasteners: My original intent was to use brass dome nuts all over the engine. To use them, a stud has to be made (preferably of stainless as bare steel will corrode quickly) and on a twin that is a considerable bunch of work. I've found that there is so much piping and ancillaries that mount on a steam engine in service that adding doodads no one will ever see is not a very worthwhile use of time. Maybe the cylinder heads and steam chest cover, but the crank area winds up pretty much buried in the installation under pumps piping and valve gear. I just used hex bolts as they are much easier and more easily sourced in a remote location.
My only beef with this engine is that it is too short in height for a tug (as are just about any other casting set available), I think people are surprised at how small the engine looks in the engine space. I may do another M'ish engine some day with same cylinders, base and crank, but cast back, much taller and Navy style valve gear.
-Ron
-
racerfrank
- Full Steam Ahead
- Posts: 114
- Joined: Mon Nov 26, 2012 8:18 pm
- Boat Name: No Boat Yet
- Location: Milton PA
Re: Tiny Power M Twin Build
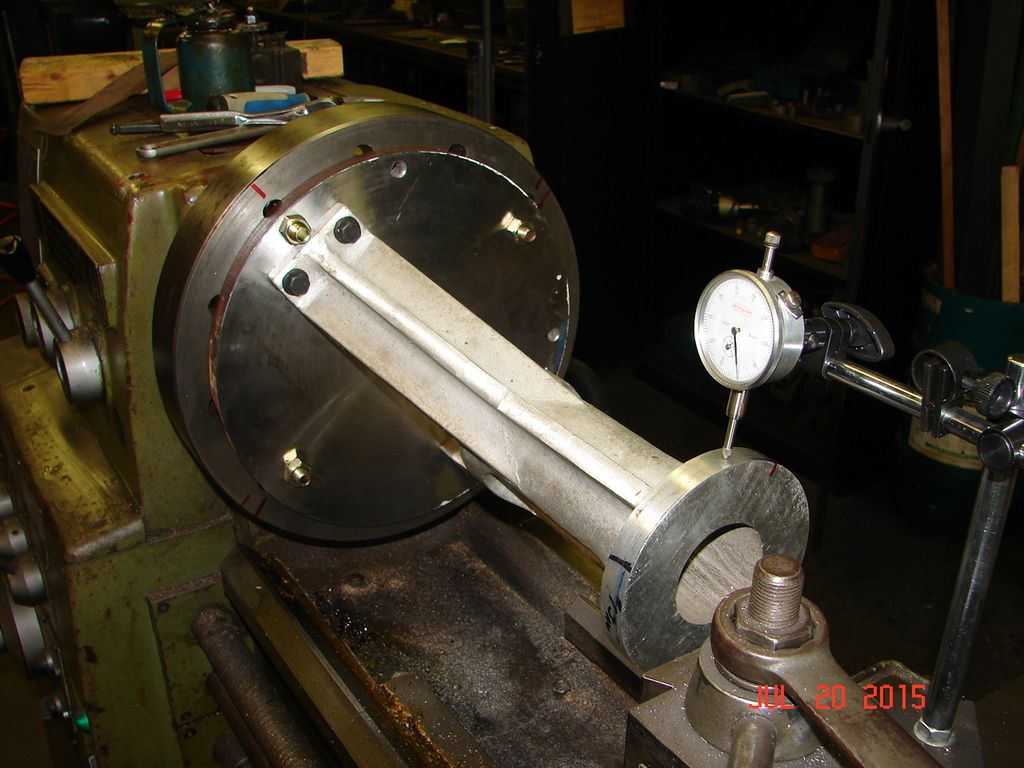
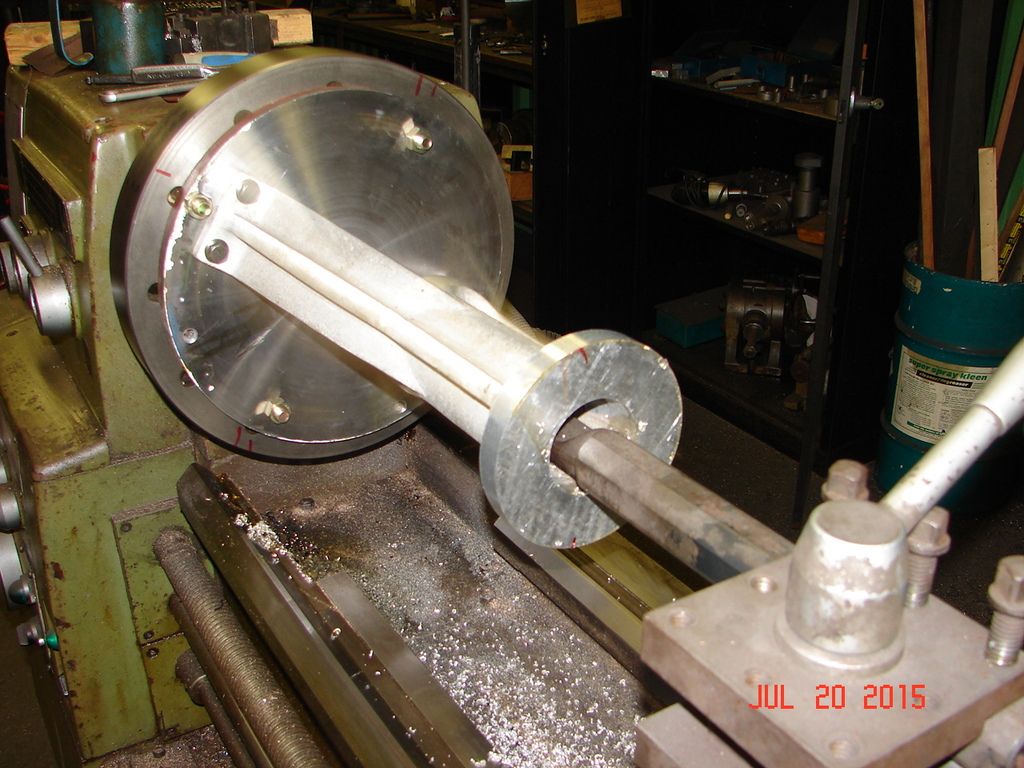
A little more progress today. (The heat got the best of me this morning). I set up and drilled the hole in the bottom of the standards. the steel ring was machined to fit the top of the standard and then centered in the mill and clamped down. Then the standard was clamped to the table.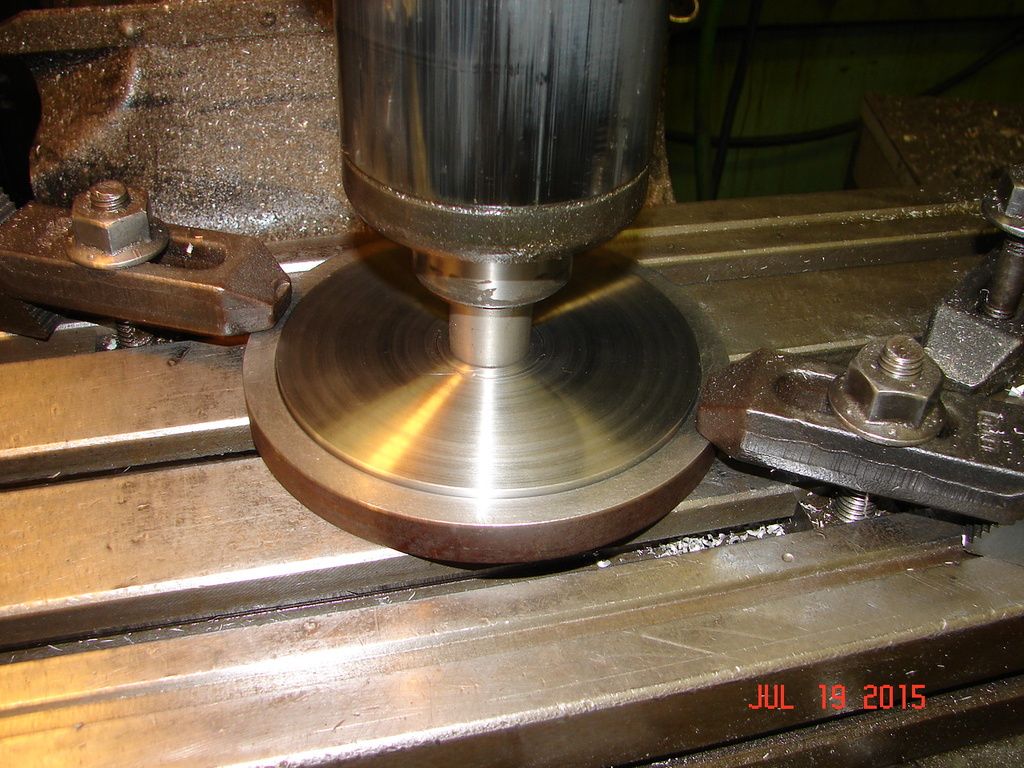
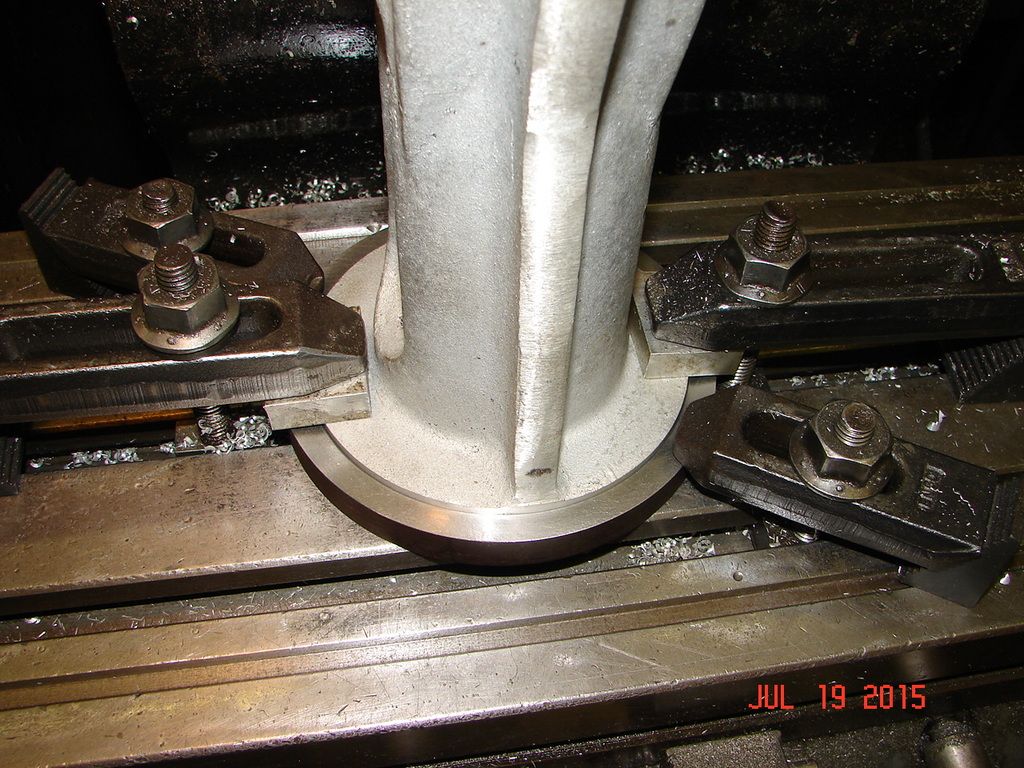
The standard was set square and then I made a light cut on both sides so down the road I can set the standard square again to drill the cylinder mounting holes.
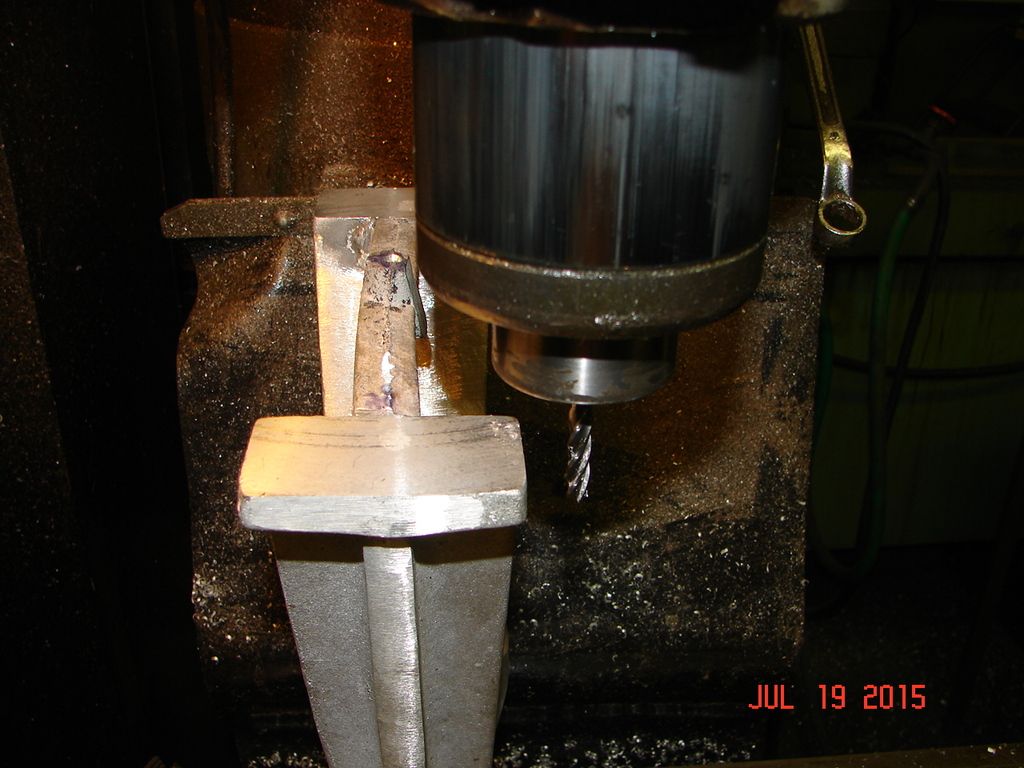
Then the offsets were made and the mounting holes drilled.
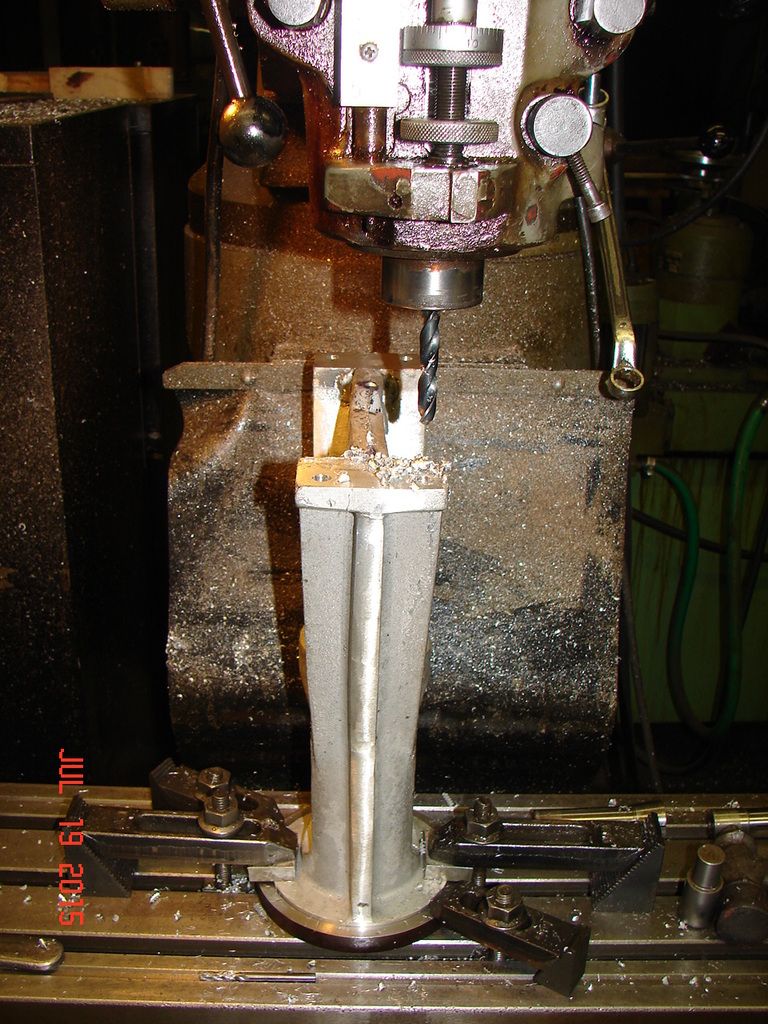
I decided to keep the support in place until after the standard is bored. so I milled the support so it is a bit under flush. I am Now thinking I might set up lathe face plate and drill and tap holes directly to the plate. Thoughts?
The standard was set square and then I made a light cut on both sides so down the road I can set the standard square again to drill the cylinder mounting holes.
Then the offsets were made and the mounting holes drilled.
I decided to keep the support in place until after the standard is bored. so I milled the support so it is a bit under flush. I am Now thinking I might set up lathe face plate and drill and tap holes directly to the plate. Thoughts?
-
racerfrank
- Full Steam Ahead
- Posts: 114
- Joined: Mon Nov 26, 2012 8:18 pm
- Boat Name: No Boat Yet
- Location: Milton PA
Re: Tiny Power M Twin Build
A little progress. Crosshead liners were turned to dia.
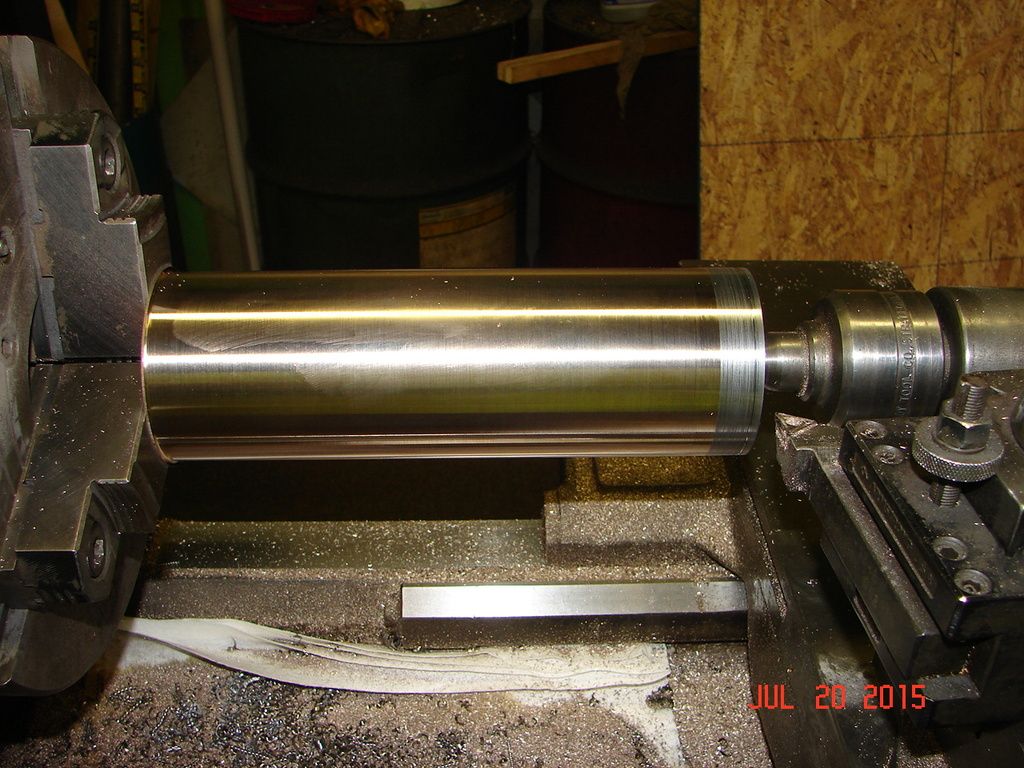
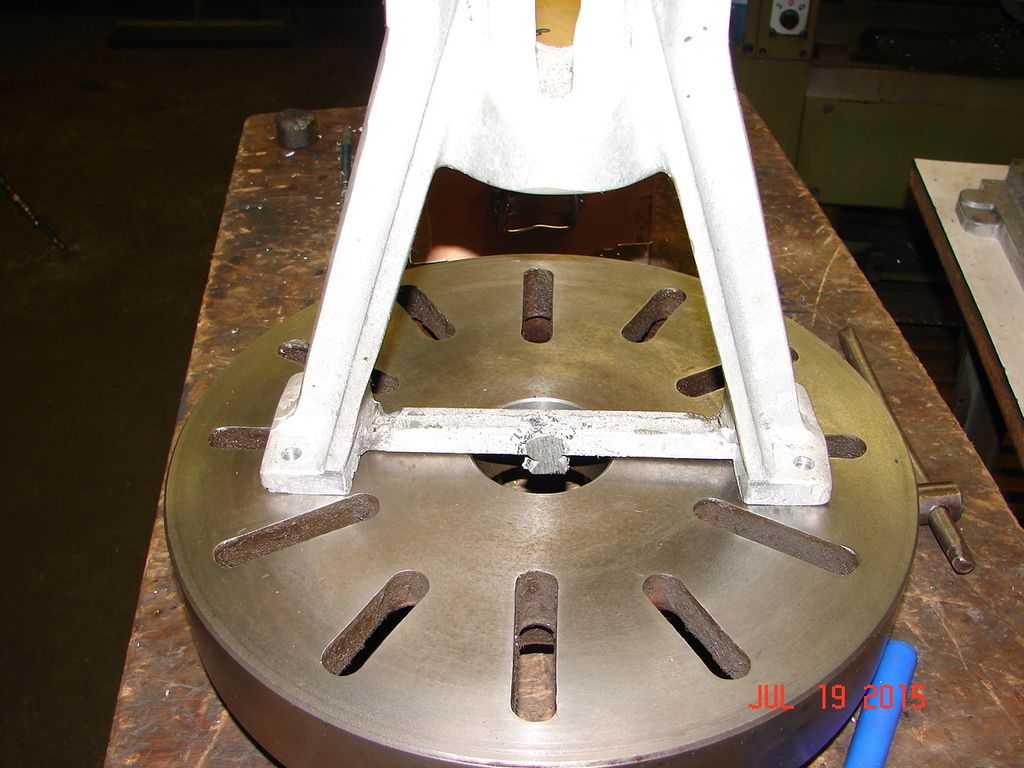
The standards were bolted to the "adapter" then bolted to the faceplate and centered.
BORING!! And there are several definitions of boring. At 160 rpms it took 11 minutes a pass , BUT ,no tool chatter. I did have a little part deflection. If it would have been .030 smaller in dia I could have used the steady rest. A few clean up passes took care of it.
After boring to size it was heated to expand sleeve locking compound was applied and the liners were slide into place and allowed to cool.
Liners were bored to dia and then the standard was trimmed to length.
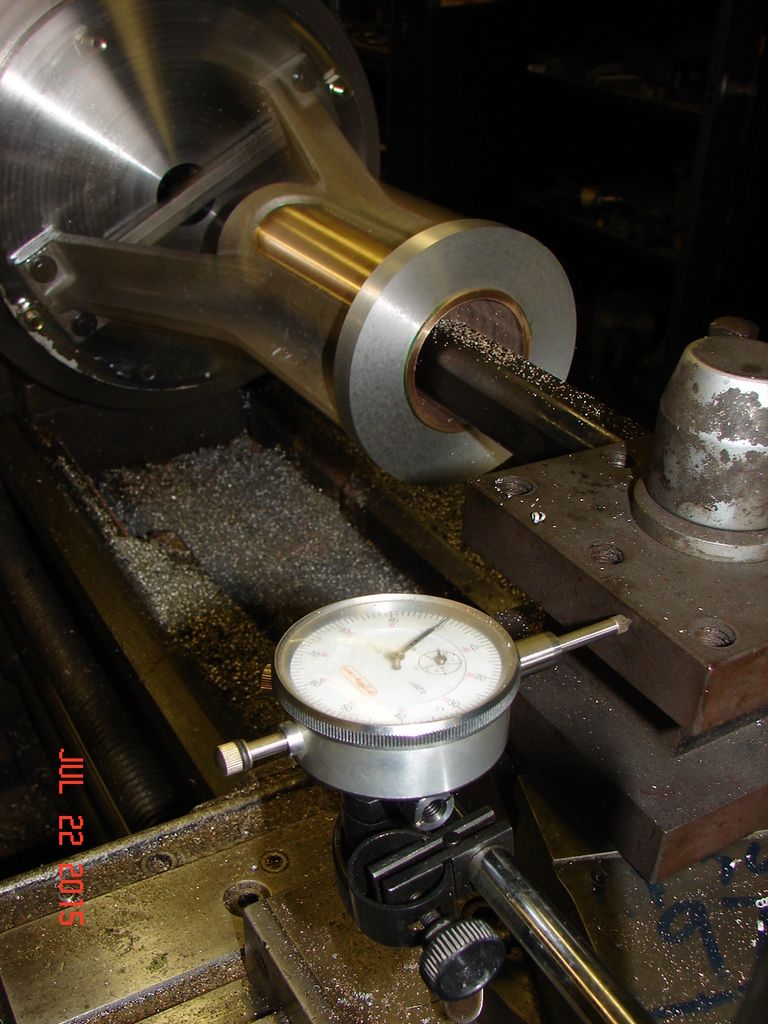
Until next time
Frank
The standards were bolted to the "adapter" then bolted to the faceplate and centered.
BORING!! And there are several definitions of boring. At 160 rpms it took 11 minutes a pass , BUT ,no tool chatter. I did have a little part deflection. If it would have been .030 smaller in dia I could have used the steady rest. A few clean up passes took care of it.
After boring to size it was heated to expand sleeve locking compound was applied and the liners were slide into place and allowed to cool.
Liners were bored to dia and then the standard was trimmed to length.
Until next time
Frank
-
racerfrank
- Full Steam Ahead
- Posts: 114
- Joined: Mon Nov 26, 2012 8:18 pm
- Boat Name: No Boat Yet
- Location: Milton PA
Re: Tiny Power M Twin Build
A short boring video.[Youtube]http://www.youtube.com/watch?vB6stna-JzqE[/Youtube]
Can't seem to make this work
Can't seem to make this work
-
Steamboat Mike
- Steam on Deck

- Posts: 54
- Joined: Wed Apr 10, 2013 7:27 pm
- Boat Name: Catawissa
- Location: Sweetwater, New Jersey
Re: Tiny Power M Twin Build
Frank,
Nice job, going much faster than the speed of my twin.
With regard to your choice of fasteners may I add my two shillings? When threading into aluminum my preference is for coarse thread studs threaded into the bed, the other end being single point lathe turned fine threads. The threads can be threaded for a very nice, no shake, fit on the fine thread nut end. This avoids the wear on the aluminum threads, makes the load on the threads stationary when pulled up for the final tightening and gives the benefits of fine threads for tightening the nuts. What I did was cut the heads off 1/2" socket cap screws, using the factory, rolled threads for the bed end. The cut end I finished in the lathe then LocTited into the holes. Here is where the plot thickens on the cautionary tale. I tried all the studs dry., everything fit so well, I was very pleased. Took off the caps, gooped up the studs, drove them home finger tight and went to bed for the night. Next day...... nothing fit! Well, it did not take long to figure where I had been sleeping at the switch. The clearance on the commercial threads was enough to let the studs drift just enough to not fit anything. I was using 1/2" drilled holes for 1/2" studs, no over size. A little work with a torch and a lot of wire brushing and I was ready for the second successful try with the bearing caps in place. The studs were lined by the caps and all was well.
I always thought studs with a thin jam nut and extra thick main nut on top to be the "proper" look for engine main bearing studs. For the frosting on the stud you can turn the end to the root diameter, that is remove the threads, for a length of about 3/4 of the diameter, break the sharp corner on the end with a nice radius then cross drill for a small cotter key. Not really necessary but it sure looks nice.
Keep sending in the continuing story of the building of the Mighty M.
Best regards, Steamboat Mike
-
DetroiTug
- Full Steam Ahead
- Posts: 1863
- Joined: Fri Nov 27, 2009 5:56 pm
- Boat Name: Iron Chief
- Location: Northwest Detroit
Re: Tiny Power M Twin Build
The link was missing the = sign. Had to try it a few times before it worked.
-Ron